I’m back for another round of my continued experiences with the Doomsday Heist and my current walk through of the next Act in the DLC. If you remember last time, I went through the last of the setup missions as well as the grand finale of Act I.
It was very challenging especially getting through the Server Farm setup mission and then liberating the IAA base in the finale of Act I. I had numerous mission failures and restarts especially when it came to the final mission. Even though it was tough, I was eventually able to pass both missions with the help of different players.
Now that I’m working for the government via the IAA, it is time to move on to Act 2 and I guess this is where things will really start to heat up as it is brought to my attention that there is a Russian sub just off of the coast. Almost seems coincidental with the latest nuclear sabre rattling Russia is making in real life. Anyway, here is my latest experience with the Doomsday Heist, Act 2.
Prep Mission 1: Keycards
Time to start the first prep mission. This one requires me to steal a N.O.O.S.E van that has been sent to the scene of a robbery. It contains key cards that I will need later to get into the airport and take hold of an Avenger (a flying fortress basically).
As usual when starting these kinds of missions, none of my personal vehicles are outside the facility so I have to steal a vehicle from a random pedestrian. The car I’m able to take is not too fast and tends to flip over easily on some curves which you’ll be able to see happen in a video of this mission at the end of this article.
After driving a bit towards my location, I see a vehicle I want and end up crashing into it. The person driving that car is not too happy and gets out of the car, pulls out a gun and starts shooting at me. I respond by getting out my heavy assault rifle and easily take care of him. I’m now able to get into this much faster muscle car and drive towards my destination.
Once I arrive at my destination, Lester lets me know that the bank robbers decide it would be great to have a shootout at a gas station that could go up in flames at anytime. I now have to steal the riot van as quickly as possible before a massive explosion happens. I’m able to quickly run up to it and get in, but the dozens of cops that are there unfortunately see me get into the riot van and that automatically puts me at a 3 star wanted level.
The police start shooting at me, but thankfully the riot van is very heavily armored and I don’t have to worry about bullets hitting. I do have to work about this gas station going up in flames so I have to hurry and get out of there. It’s tough though because there are so many vehicles in front of me as well as behind me. As I start to try to navigate my way out of there, a massive explosion happens from the gas tank that takes out the bank robbers and a good chunk of the cops as well and I’m able to get away from there now thanks to some of the cars now burning hulks of metal.
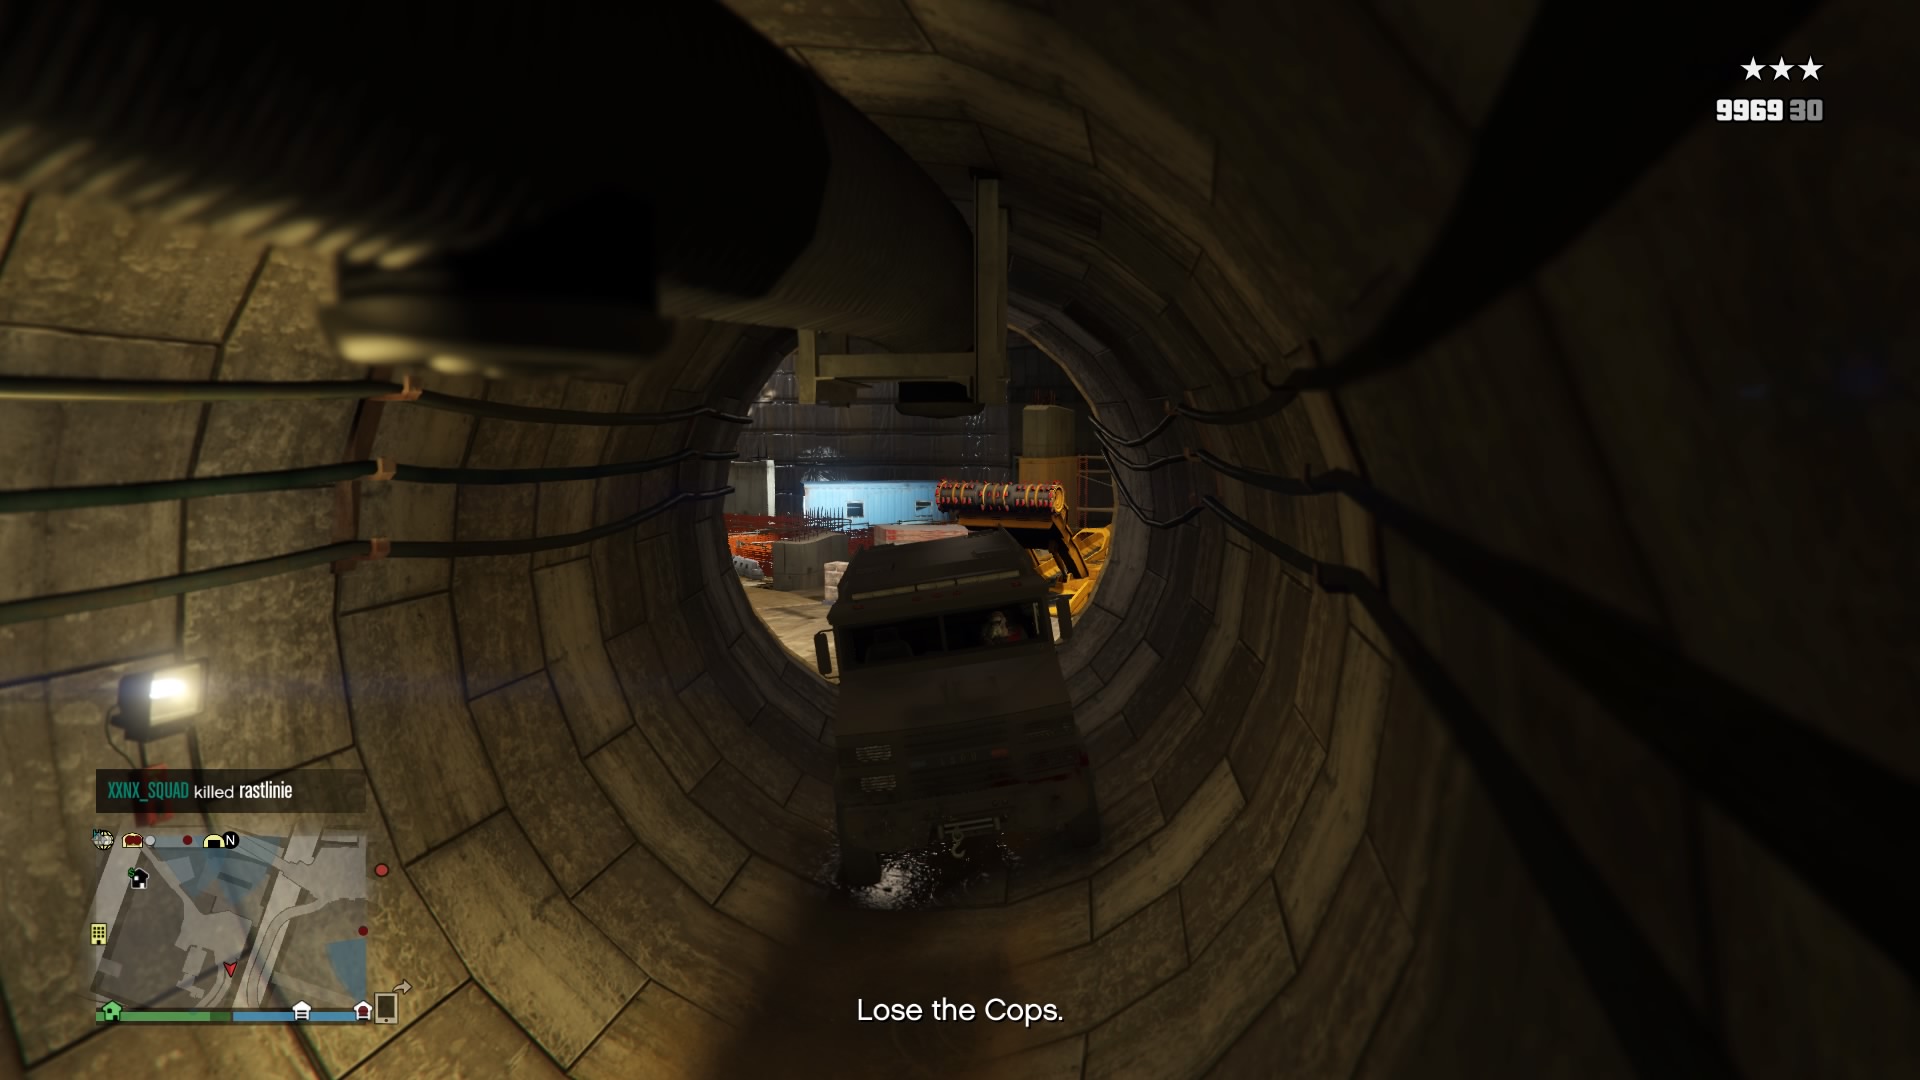
I still have the 3 star wanted level and I have to lose it in order for me to complete this mission. The riot van is not very fast, but I have an idea on how to lose the cops as I decide to head towards the freeway and get to a section of it in the downtown area where there’s a nice, large opening in the side of the wall that goes underground. I’ve used it many times to get away from the cops and this time will be no different.
After I arrive to that opening, it takes just a bit of time for me to navigate the large vehicle into the opening, but once I do, I’m able to drive down into there and to a certain distance where the cops won’t follow me. Now all I have to do is wait. It only takes about a minute or two and the wanted level is gone. I’m now free from any further distractions and I should have no problems getting the vehicle back to my facility. Oh if only things would actually always be that easy.
Once I re-emerge from the tunnel underground, I’m back on the freeway and head towards my destination. As I’m getting near my exit point on the highway, I hear and see an explosion very close to my vehicle (thank goodness it’s very heavily armored). I now have noticed that an online player has spotted me in an attack helicopter and has decided to try to prevent me from completing my mission. I’m determined not to let this happen and just before I get to my exit, I’ve got a nice surprise for him.
I immediately stop under an overpass so that it is hard for him to target me, I get out of the vehicle, and then get out my rocket launcher with homing rpgs. I notice that he has flown over the overpass and dropped down a bit to try to target me. Not long after he does that, I walk out from under the overpass, target him with my rpg and fire. A massive explosion results and I no longer have to worry about him or his attack helicopter. It feels nice for a change that I was able to defend myself and continue on with my mission.
As I continue and get very close to my underground facility, I notice on my mini-map that there is something heading towards me pretty quickly. I switch to the bigger map to take a look and it is the player whom I destroyed for trying to ruin the mission. It appears he didn’t take too kindly to me killing him and he wants revenge. I do not let him get it through as I arrive at the facility and head underground. The mission is completed and now I’m ready to do prep mission number 2.
Prep Mission 2: Drug Dealers and a Hostage
This prep mission turns out to be a bit different from the previous one as I have to try to get information on a person being held hostage from drug dealers. This mission is not really difficult, it just kind of gets tedious and you’ll see what I mean shortly.
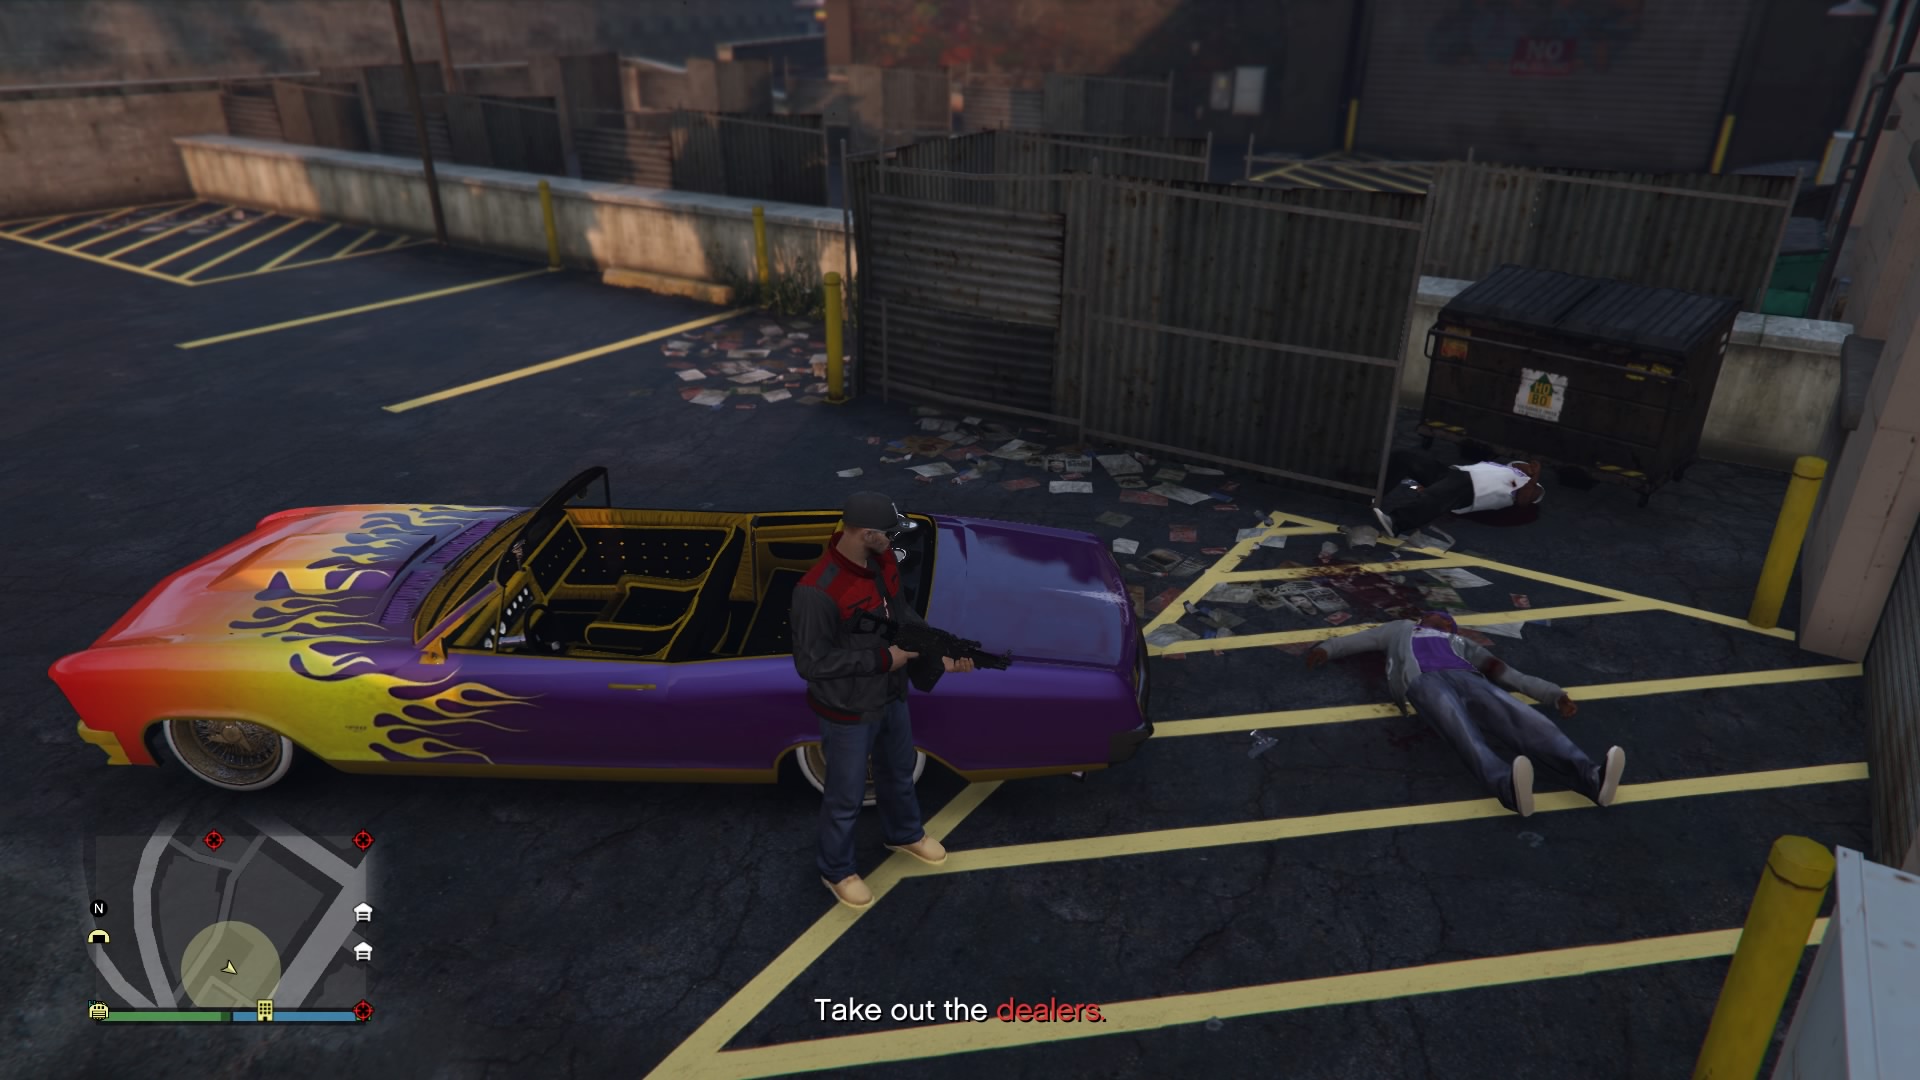
An IAA agent known as ULP has been taken hostage and so I have to get information on where he’s being held at. I have to go to an apartment and kill the drug dealers inside. Once I get in there, I end up taking some gun fire, but not enough to kill me. I do take cover at certain spots and I’m easily able to take down the drug dealers inside thanks to my heavy assault rifle.
Once I’m done in the apartment, there are 4 other drug dealers I have to go after in various parts of the map. One of them is nearby and I chase them down (in one of their own low-rider vehicles from the apartment. Tough to drive with how low to the ground it is), get in front of their car and block them from going any further. He decided to get out of his car and pull his gun out, but I’m ready for him and take him out.
The next one is way up there near Sandy Shores. I have to drive a ways to catch the next drug dealer and I’m thinking he’s in a car, but when I get up to him I see that he’s actually riding a bicycle. Needless to say, it was easy to take him out. Moving on, I head back into the city to get the other 2 whom also happen to be on bicycles. After I catch up to the third one and take him out, I head for the final one at Los Santos airport.
I quickly drive up to him and ram him on his bicycle and he goes flying way up in the air lands hard onto the asphalt. How that didn’t kill him I don’t know but I made sure he pretty much stayed on the asphalt. After killing the last one, he apparently had the information on where the captured IAA is being held and the mission is now completed.
Prep Mission 3: Starting a Riot
I’m now moving on to the 3rd prep mission. I have to get to a certain area, which pretty much resembles a university (USLA), and cause a riot so that a very large riot control van will be sent out to quash it or at least bring it under control. This is not the same type of armored van I stole from the 1st prep mission.
As usual, I have to find and steal a vehicle upon the start of this mission. I’m able to steal a large hummer like vehicle this time and start driving towards my location. Lester then tells me not to kill anyone, that the purpose is to start a riot and not get the police involved.
I finally arrive at the university and I’m told to use tear gas to start a riot. I think that’s quite interesting considering if you normally throw tear gas into a crowd in this game, most people will scream and run away or run into it and die. Well, I take a tear gas canister from my arsenal and throw it into the crowd of college goers.
That’s all it took as the people that were talking to each other suddenly started throwing punches at each other and other people. I unfortunately was a target as well as one person came up to me and started punching my character in the face. I do punch back a couple of times, but I have to be very careful not to kill anyone so I eventually run away from him or at least enough of a distance to keep his punches from connecting to my face.
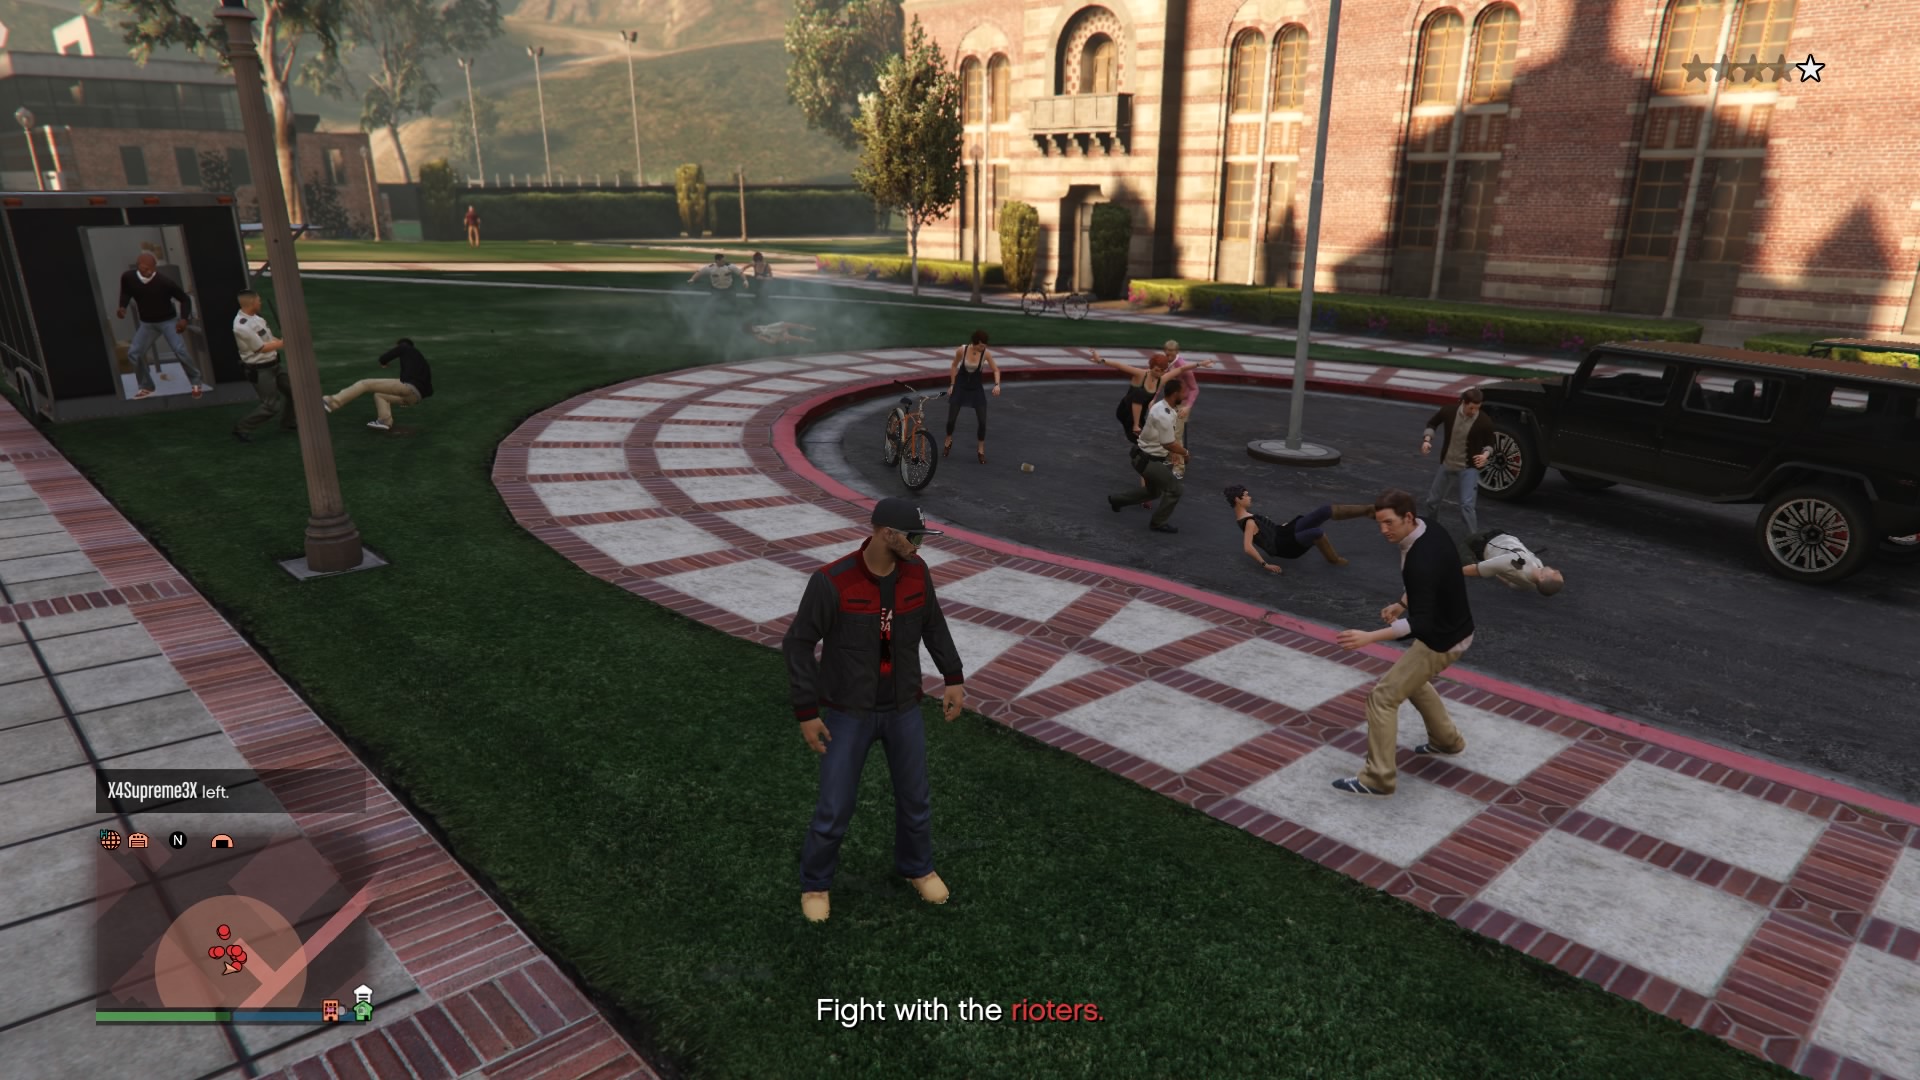
Soon some of the on campus riot police arrive and start hitting some of the other people in order to try to control the riot. I still have to wait for the riot control van to arrive. In the meantime, I’m just running around the area, knocking people over, avoiding punches and watching the riot continue. Ahh, is this kind of a throwback to some of the earlier Grand Theft Auto games such as GTA 3 and San Andreas where you could put in a code to start a riot all over the city? It was pure chaos and such a blast to try to survive. I really wish Rockstar would bring that back in full form.
Finally, the RCV arrives. Unfortunately, it starts shooting water from a large cannon on top of it and I’m not able to get out of the way. It knocks me to the ground and pushes me away. I try to get up, but it’s no use as I’m pushed against some stairs and my health quickly depletes until I’m dead.
Once I respawn, I quickly head back to the area I was at before which thankfully I didn’t spawn far away from. I quickly make a beeline to the RCV, avoiding its deadly water cannon and making it to the driver’s side door. I quickly throw the driver out just as another riot police guard comes up and tries to hit me, but I’m already inside the van and quickly back up to drive away. Of course stealing the RCV automatically puts me up to a 3 star wanted level very similar to when I stole the armored van from the first prep mission and so I have to get rid of that wanted level to complete this mission.
I’m going to do what I did during the prep mission which is to get to that big hole on the side of the freeway in downtown Los Santos and hide from the police until the three stars are gone. There are other players in this particular lobby, but fortunately none of them decide to come after me.
In order for me to find the best route to my hideout on the freeway, I bring up the map to check my location and see where I have to go and then begin the drive there shortly thereafter. Once I arrive, I carefully navigate the RCV into the opening in the side of the wall and descend further down into the tunnel. All I have to do is just wait a bit and my wanted level is gone. My RCV gets stuck a bit down there, but I’m eventually able to maneuver it out of there and head towards the facility to complete the mission.
Prep Mission 4: Strombergs
If you remember back when I was doing Act 1 of the Doomsday Heist, one of the prep missions for that required me to accrue 4 Deluxos. The mission wasn’t super hard and it took awhile because I had to go back and forth to retrieve them. There were also a few times that I had to deal with other players trying to disrupt my mission, but eventually I succeeded.
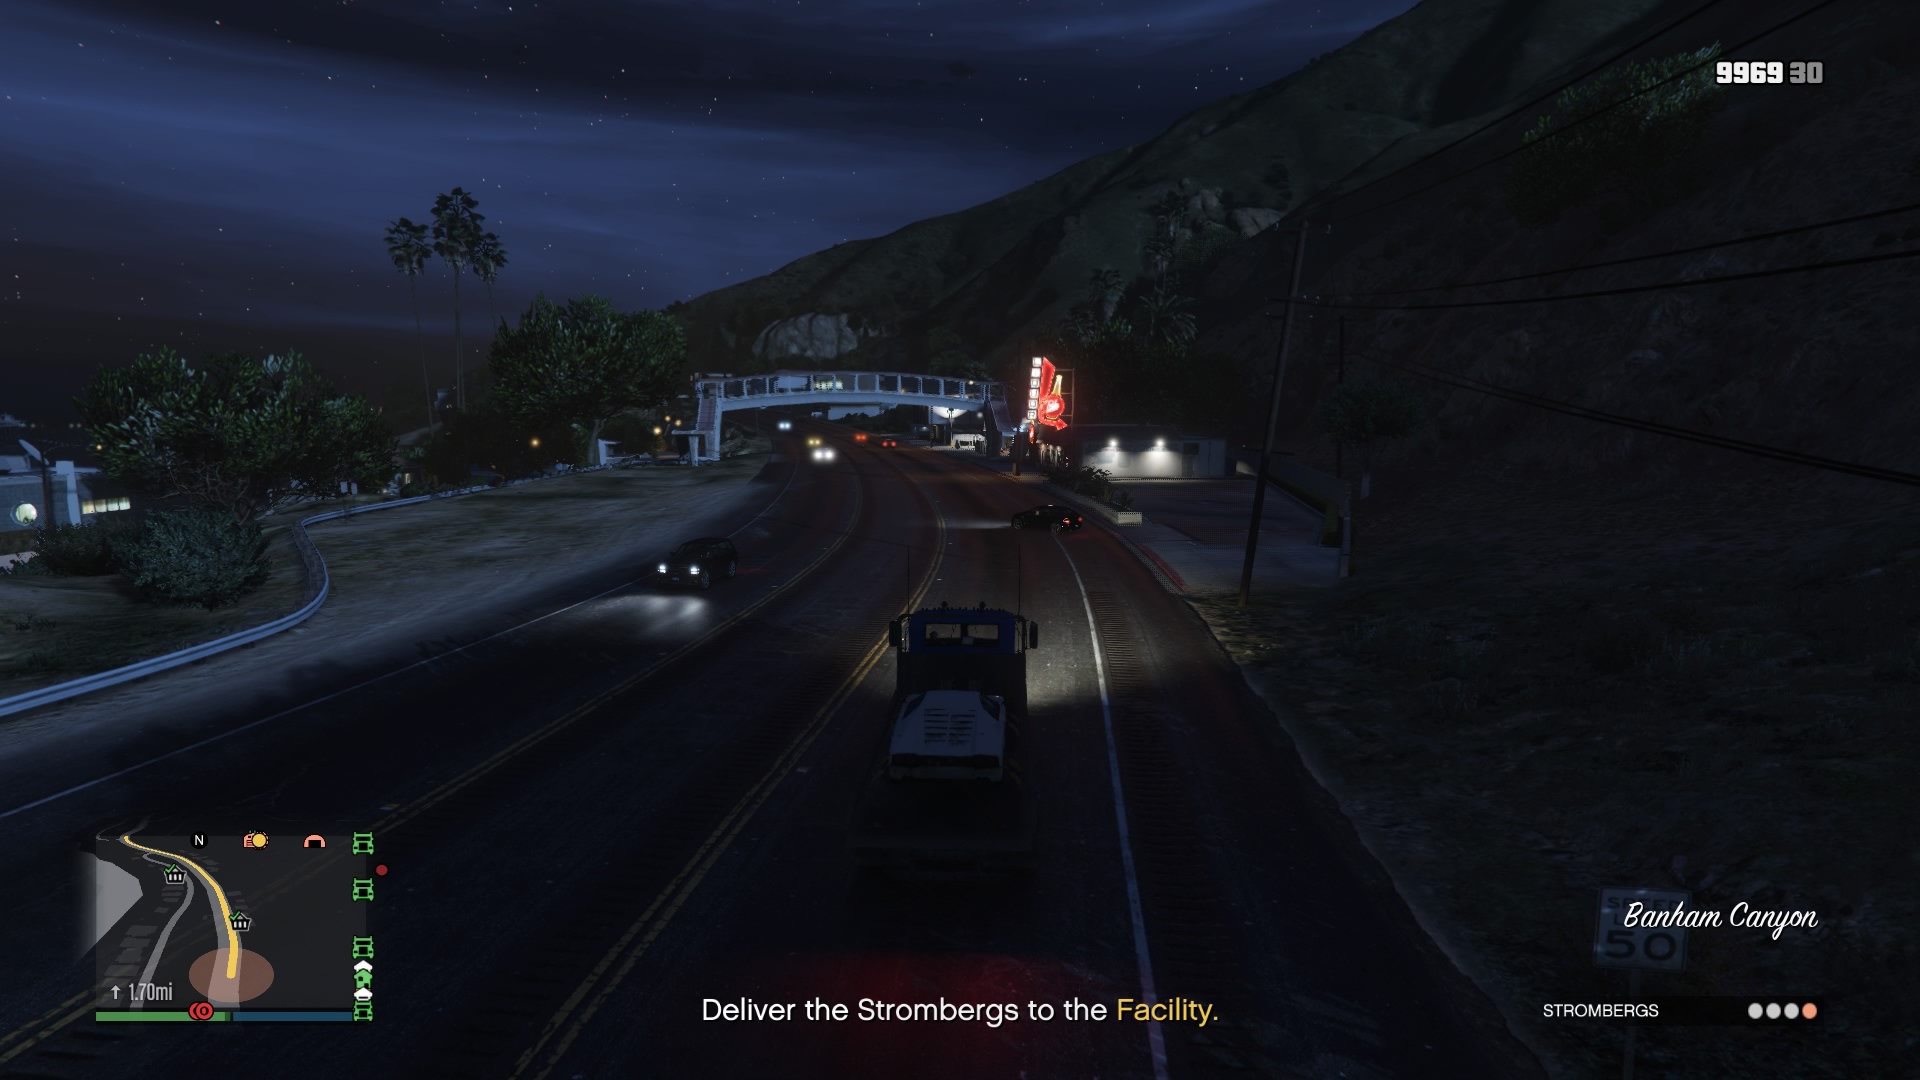
Guess what I have to do on this particular prep mission? Time to retrieve 4 Strombergs, but I don’t have to go to a wealthy person’s mansion in order to retrieve them. There are multiple trucks driving around the map that hold vehicles on them in which most of them will end up being Strombergs.
The first 3 trucks I went to all had Strombergs on them and so what I had to do was to get the trucks to slow down or stop and then throw the drivers and usually a passenger out of the truck. I had to then drive each truck back to the facility which took a lot of time and then drive on to the next truck.
After I got the 3rd truck back to my facility, there were a few trucks left. Two of them actually did not have Strombergs on them and so I drive towards the last one on the map that happened to be at Los Santos Airport. That turned out to be pretty easy to steal and I was able to drive it to my facility and complete the mission.
This one was a relatively easy prep mission, it was just tedious because it took a long time to complete as I had to drive to the different trucks all across the map and not all of them would stop so that I could steal them. Now believe it or not there is a final prep mission to complete.
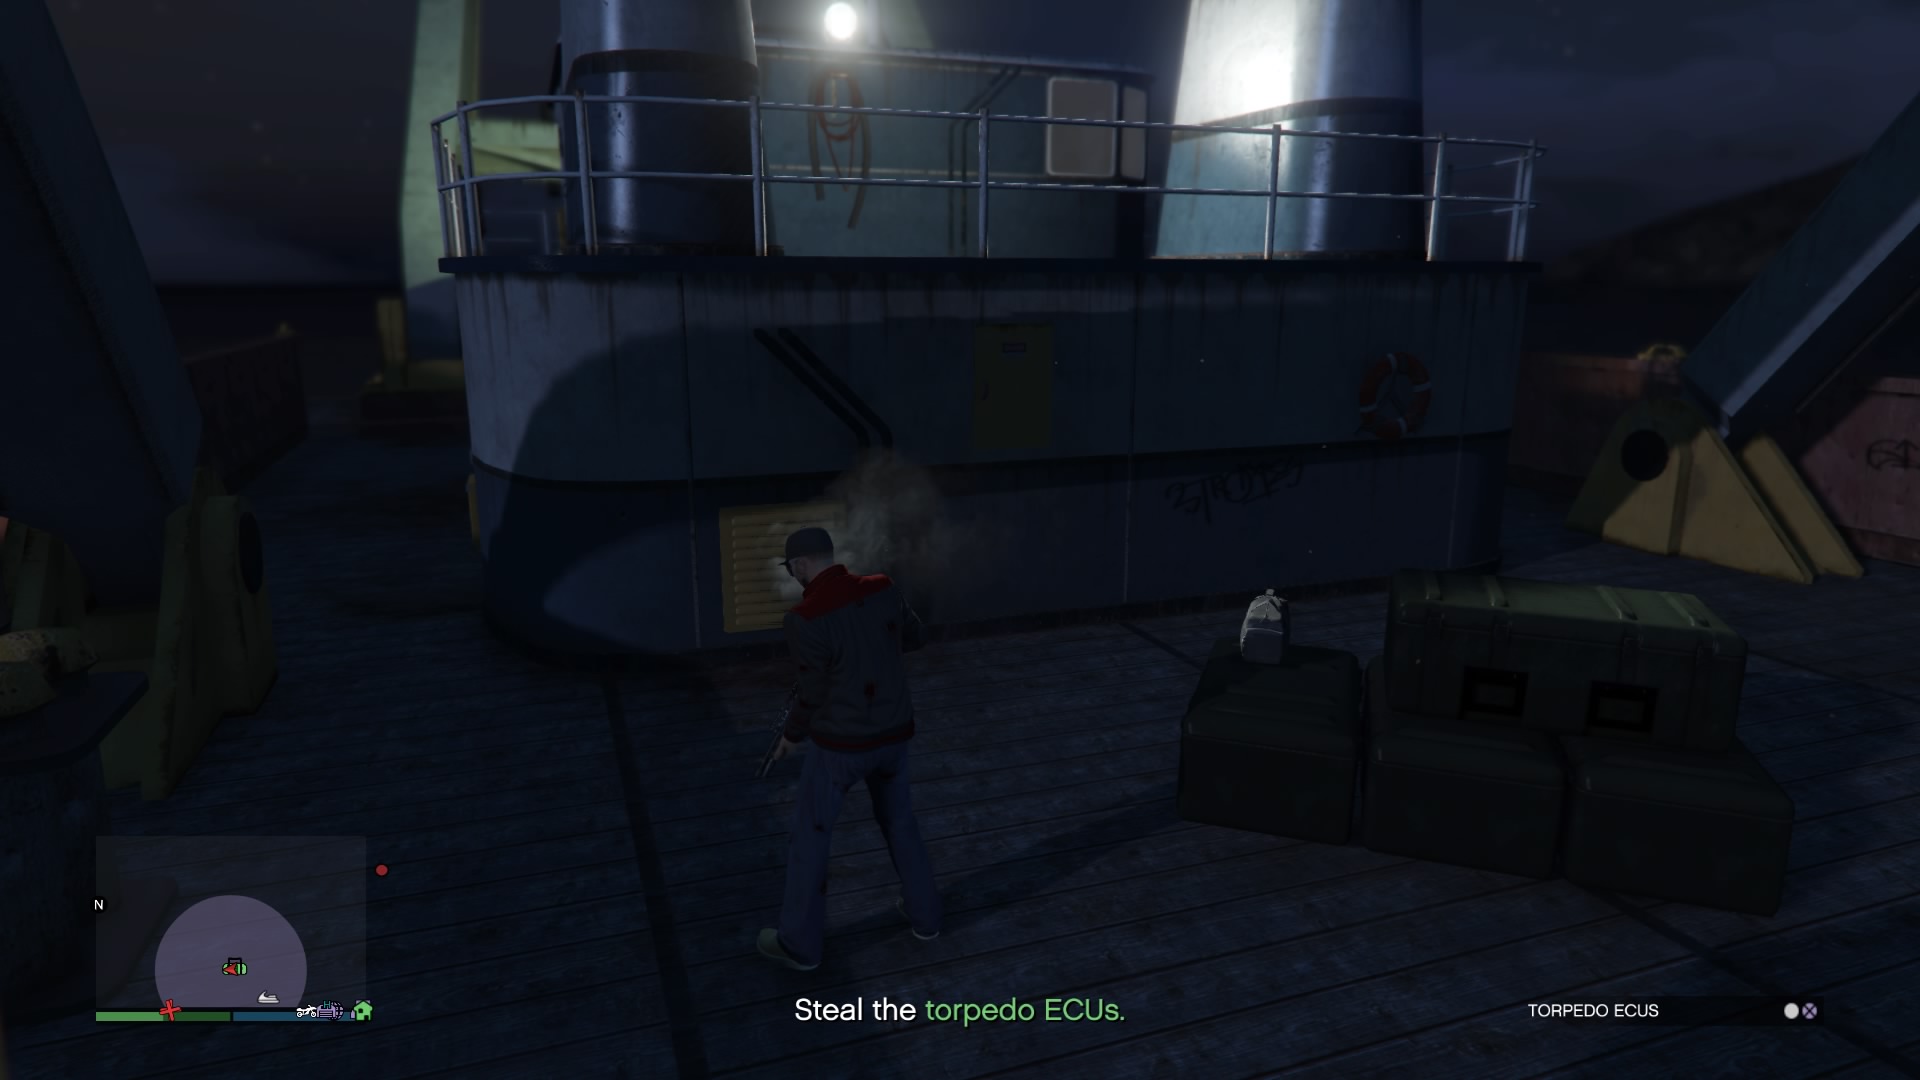
The Final Prep Mission: Stealing Torpedoes
Believe it or not, there is a 5th and final prep mission before starting the setup missions. Since Act 2 deals with what appears to be a Russian sub off of the coast, I have to do things to get prepared for the main mission in which it is involved.
In this particular prep mission, Lester informs me that there will be torpedoes involved when we deal with that Russian submarine, but we will need what’s called ECUs known as Electronic Control Units. Apparently, there are some just off of the coast on a platform and so I have to go and retrieve them.
This time when I start the mission, I do not have to go and steal a vehicle as I’ve decided to leave my own vehicle just outside the facility instead of driving in with it. So now that I have the Oppressor, I’m off on GTA 5’s version of the Pacific Coast Highway and towards the coordinates on my GPS so that I can complete my mission.
Once I arrive on the beach, there’s a jet ski I need to get onto and head towards the platform which thankfully is not far off from the beach. Once I arrive there, I’m immediately fired upon by people/enemies protecting the ECUs. I do end up getting killed once by them as I didn’t see one as I came around a large shipping container.
After I killed the remaining enemies, I go to where both ECUs are, but I can only pick up one of them at a time. As soon as I pick up one of the bags though, two enemy helicopters immediately appear on my radar and are quickly heading towards me.
I want to deal with these helicopters and so I get out my rocket launcher and fire its homing missiles at one of them and blowing it out of the sky. I’ve also been taking heavy gun fire from of the enemies on the helicopter and so my health has rapidly depleted. I’m not dead yet though and I manage to blow the second chopper out of the sky.
Believe it or not though, there is a helicopter on that platform that I can steal and fly back towards land. This is what I end up doing, but as I’m flying towards the beach to where my vehicle is at, I start taking gun fire again from another 2 helicopters that have entered my area.
I’m able to make it back to where my Oppressor is at, but as soon as I get on it and maneuver it to where I can get away, a bullet goes through my head and I am killed. After I respawn, I get out my rocket launcher and target both helicopters, but the first couple of them miss the first helicopter I’m targeting. After firing yet again, it finds its mark and destroys the first one and I manage to target the second one, but as soon as I fire, I’m killed from one of the gunmen on board. It was nice though to see it blow up just as soon as I died.
When I respawn, I immediately run to the Oppressor and begin the drive to my facility so I can drop off the first ECU. There are 2 more enemy helicopters, but they are actually staying over by the platform and are not giving chase. I suspect they want to protect the 2nd ECU from being stolen.
After I drop of the first ECU, it’s time to head back to platform so that I can retrieve the second one. I end up taking the helicopter I stole back to the platform. The 2 helicopters begin to come after me, but I manage to land on the platform. I don’t have a lot of missiles left from my rocket launcher and so I get my heavy assault rifle out and instead start targeting the gunmen on board the helicopters.
This works and I’m not taking as much gunfire as I did before. I even take out the pilots causing the helicopters to crash. I retrieve the second ECU and get in the chopper and take off to head back towards the beach. Needless to say there are 2 more helicopters in bound and my chopper starts to take heavy fire. Unfortunately, my helicopters has received heavy damage and won’t be able to make it back towards land. I have no choice but to bail out, but I end up killing myself instead.
I do end up respawning on the water, but on a jet ski as I have to go back to the platform to retrieve the ECU. After I get it, I head back towards the beach, get on my heavily armed motorcycle and start to drive away, but I automatically target one of the helicopters and decide to fire a missile at it. Big mistake as I didn’t see a sand pile right in front of me and ended up killing myself as well as my motorcycle. I’m really getting annoyed by this point and just really want to complete this mission.
Again, I have to go out to the platform as the ECU respawned there and retrieve it. I have to deal with helicopters again and when I get back on shore, I decide to use my mini-machine gun to take them out. I then have to steal a vehicle which proves a little challenging at first, but I do eventually get one. I’m able to drive back to the facility and complete the mission.
Setup Missions Are Next
All 5 prep missions are now completed and I have the setup missions that are going to be next in line. The last prep mission turned out to be longer than I wanted and I underestimated those helicopters.
I have a big feeling that the setup missions are going to be really difficult especially since I have to have other players involved with those and so you know that there are going to be a lot of deaths and restarts to come when I eventually try them out.
Hopefully you enjoyed my experiences with the prep missions in the Act 2 of The Doomsday Heist. Here are couple of videos below of my prep missions in action. As always, feel free to leave comments.
I had seen the previews for Doomsday heist and I even think I have read one of your other posts on the DLC but I have yet to play it.
There are plenty of GTA5 DLC and they all looks fun. It is nice to see the game didn’t stop at the original story mode and there are plenty of other portions of the game to experience.
I played the biker dlc and absolutely loved it… I can’t wait to dive in Doomsday Heist and will most likely finally download it tomorrow. Any suggestions, do and don’t?
When doing the Doomsday Heist, especially the missions that involve other players, prepare for many restarts because some of them are more than likely going to get killed. Definitely take a lot of cover as you’ll get into a lot of big firefights.
I absolutely love GTA and I have been playing it since launch. I really enjoy the fact that you talked about the wonderful act and how it directly will impact our gameplay. Once I buy a PS4 I am going to redownload GTA and get back online immediately. I appreciate your review.
You must play the Doomsday Heist when you redownload GTA 5. It is just so much fun and the missions are insane, but a blast to play. Make sure you purchase a facility though.